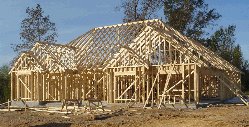
How to Check the Wall Framing
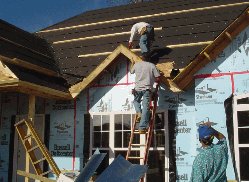
Now that you've gone through your new home while the wall framing is laid out, and checked every wall dimension, the raising of the wall studs will follow immediately. Stay out of the way of the framing crew, but be ready to check all the wall framing with your drawings and measuring tape.
I got really frustrated during my checking of the window and door openings on one of our houses. I had previously found a main long wall of the house to be out of parallel (measured and laid out by the framer himself). The framer and his crew were framing the house, supposedly doing everything correctly. I found more than one door opening that was framed to the wrong width. (I was finding the framing crew's mistakes, while the framer and his crew enjoyed jokes and fun among themselves. I prefer a framer who will also check his work. Wouldn't you?)
One of the wrong door openings was actually framed 36 inches wide for a 36-inch door. The guy who had installed it was on another job site, so they called him on the phone to ask him how wide the rough opening should be for a 36-inch door. He replied, "36 inches." Everyone got a big laugh out of it, except me. How could this fellow know so little, that he actually thought that a 36-inch door, along with its frame, would fit into a 36 inch wide opening? (The opening should have been about 38-1/2 inches wide.) Check everything! When the time comes to install the interior doors, the drywall will be in place and finished, and you and the door and trim installer will be looking at each other like two lost puppies. And the framer will be gone. So, make sure the framed openings are correct. If you've never gone through the building of a house, you would be amazed to know how often these errors occur.
These are some of the items you must check -
Door and Window Rough Openings
The drawing below is from the floor plan I drew for a house we designed and built. Three windows are shown in the upper wall, and a door is shown at CLOSET 4. The sizes are indicated with a common convention that is used by window and door suppliers. On the window on the upper left, the label "2650" means that the window size is 2 feet 6 inches wide (2'-6"), and 5 feet 0 inches high (5'-0"). Usually a manufacturer's called out size of a window is actually the size needed for the framed stud opening. The rough opening for this window should be 2'-6" wide by 5'-0" high.
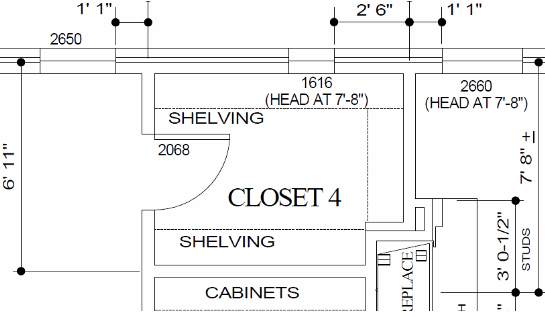
Openings for doors in the wall framing are different from window openings. The closet door is labelled "2068" on the plan above. This indicates a door that is 2'-0" wide and 6'-8" high. The framed stud opening for this door should be about 2' 2-1/2" wide and about 6'-10" to 6'-11" tall. This allows space for the door plus the thickness of the door frame on both jambs of the door. It also allows for the frame thickness at the door head, plus clearance at the floor for the floor finish and an air gap at the underside of the door. Use your measuring tape to check all the wall framing dimensions. It takes a little time (not all that much), but it's really worth it.
By the way, we used a 2-foot-wide door because it was the widest door that would fit in the space. However, we always use the widest door that is practical in each location, including 3-foot-wide doors at bedrooms.
Shower Door Openings
If you plan to install a frameless glass shower door, make absolutely sure that the wall stud jambs are as straight and plumb as possible. Later in the project, when the jambs get wrapped with drywall and wall tile, any imperfections in the wood substrate can create problems with the fit of the glass door.
If the glass shower door or enclosure will be screwed to the side of a wall instead of jamb studs, add lumber in the wall at that point. A flat 2x6, full height of the wall, or equivalent, will work fine.
Wall Bracing for the Garage Door Opener
To brace an electric garage door opener's overhead rail where it mounts to the wall above the door, solid lumber is needed at the center of the door opening. At least a double stud support should be installed between the door head and the top of the wall.
Wall Corners, and "Dead Wood"
Wall framing must include a wood framed surface along both sides of every corner, in order to give a supporting edge for the attachment of the drywall panels. The same applies at the top of every wall. There should be wood framing to which the drywall ceiling can be attached. Where there is not a joist, or a series of joists perpendicular to the wall, then "dead wood" must be added. 2x4's or 2x6's laid flat along the top plate of the wall, and extending out about an inch, are nailed into place.
Joists perpendicular along the right side, and short braces on the left side, provide attachment points for the edges of the drywall ceiling.
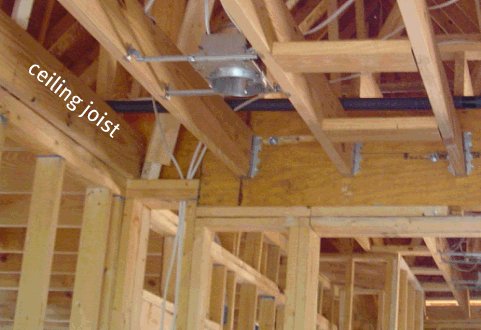
The joist running just outside the edge of the stud wall framing will support the edge of the drywall ceiling.
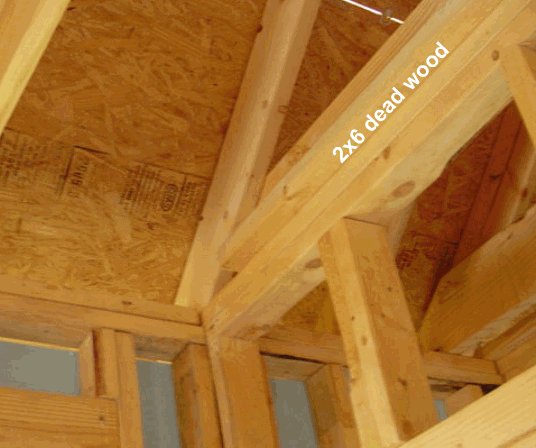
Dead wood (2x4 or 2x6 lumber) laid along the top of the wall framing on the right, where no ceiling joists occur, will support the edge of the drywall ceiling.
Don't Forget the Wall Blocking!
Take your floor plan and mark every location where you might install towel bars, toilet paper holders, grab bars or wall-mounted shower seats. Toilet paper holders should be mounted at 24 inches above the floor. Towel bar mounting heights vary depending on your preferences. Mark on the floor plan the locations and heights you decide on. Install 2x8 lumber blocking horizontally between the studs, centered on the heights above the floor that you use.
When these bars and paper holders are mounted to the wall (usually one of the last things that is done on your house), you are much better off to have solid wood to screw into. Toilet paper holders and towel bars endure a lot of pulling and jerking, so secure mounting makes a big difference. The drilled drywall inserts that come with the bars do not hold well. Give yourself some thick lumber to screw into.

Toilet paper holder wood blocking is at the lower left,
and towel bar blocking is in the upper parts of the stud walls.
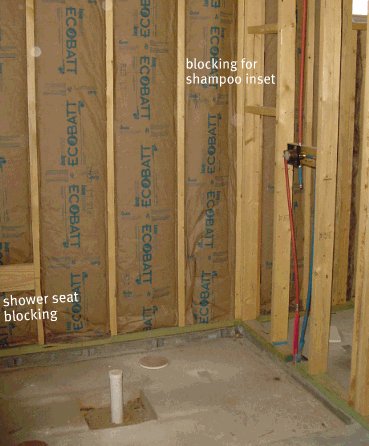
If you leave out the blocking for bathroom grab bars, or wall-mounted shower seats (shown above), there will be nothing in the wall to hold them. The pair of short horizontal 2x4's near the shower valve will form a wall inset for shampoo bottles and such. The drywall will be cut out only on the shower side, and the wall tile will go on all surfaces of the inset on the shower side of the wall.
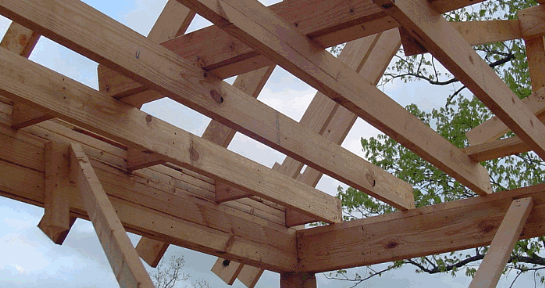
Wall Bridging
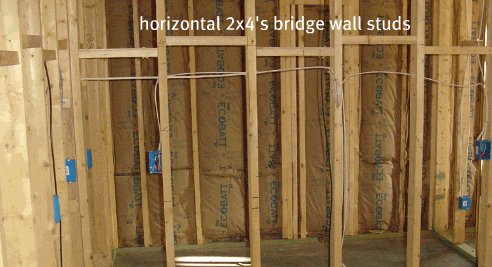
Wall stud bridging, as shown in the photo above, is required in walls that are 10 feet tall or taller by some building codes. The bridging stiffens the wall framing and causes the studs to act together as a "team." Bridging is not required in exterior walls if wood sheathing is installed.
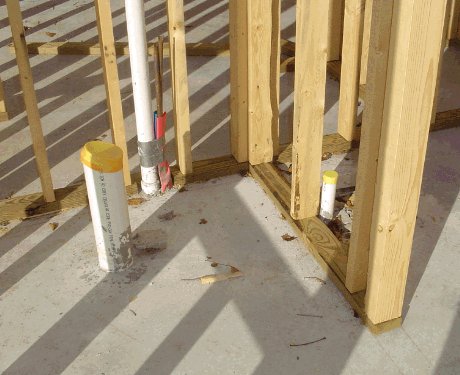
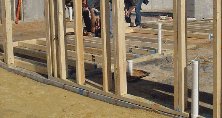
Stud Furring at Thickened Walls
You are likely to have some wall framing in your house with plumbing pipes that won't fit within a regular 2x4 stud wall (3-1/2 inches thick). Thicken the walls so there won't be bulges and bumps in the drywall later. Wood strips, called "furring," should be nailed onto the face of the studs, to make a "furred" wall. Some framers refer to this as "stripping." Use treated wood at the bottom if the floor is a concrete slab (no need for treated wood if it's a wood floor).
In the photo below, look closely at the treated studs turned upright at the bottom, and wood studs ripped down to 1-1/2 inches are nailed to the stud faces. At other times, I have used strips of OSB sheathing or plywood when we only needed 1/2 inch or so of furring thickness to complete the wall framing.
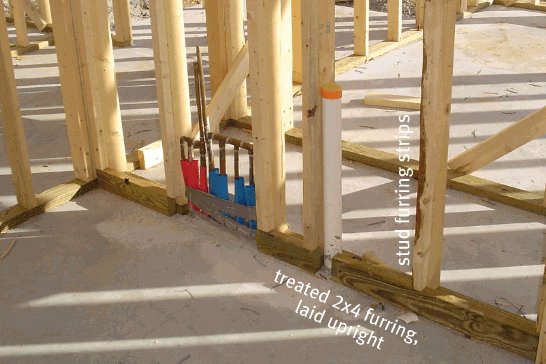
The framer might not add furring on his own! Check every wall where plumbing occurs, and have him add furring if needed. Furring is often needed at laundry room walls and bathroom walls.
This is a really exciting time in your home building project, so enjoy it! Check all your dimensions - don't assume that the wall framing is correct. Take lots of pictures, not just for fun, but so that later on you can look at them to get a better idea of what is inside each wall!
Return from Wall Framing in Your Home page to Framing page.


Vic and Susan Hunt are a husband and wife team with over 10 years experience designing and building homes.


Comments
Have your say about what you just read! Leave us a comment or question in the box below.