Site Clearing is for What You Don't Want to Keep
Other than the site clearing contractor, the only tools you need to get your lot properly cleared are a roll of flagging tape, some stakes and your vision for your land and new home. (Click here for our discussion of site design issues.)
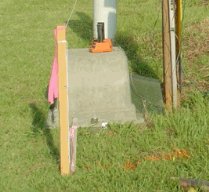
Flagging tape is such a fantastic material to use throughout the entire home construction project. In this early stage, use it to mark or flag stakes, "rope off" areas, and to mark trees. Use pink flagging tape to mark stakes, trees and borders.
Read more about the use of flagging tape.

Each person will have a different opinion of the extent of site clearing that should be done on your land. Many developers and home builders will just go through and bulldoze down every stick and blade of grass between the property lines. If that's not what you want, then don't let it happen! It's YOUR property, and you should decide what stays. Brush and undergrowth are usually completely removed, but trees are VERY different. If your lot is small, you may have a hard time saving trees if any exist. If the property is larger, with trees, you may be able to save a lot of trees.
Here's What You Should Do
1. VERIFY, WITHOUT ANY DOUBT, THE LOCATIONS OF THE CORNER PINS OF THE PROPERTY LINES.
"Don't Let This Happen to You" story:
On a lot we owned in a subdivision, we discovered that the home builder on the adjacent lot had hired a fence installer who installed a privacy fence around the back yard. The fence installer assumed that the wood stake in the undergrowth at the back corner of the property was the property corner, but he didn't actually find the surveyor's pin. When we checked that side for the house we were building, I found the pin - 3 feet away from the fence corner post they had installed! They had to come back and move the fence off the property line.
The home builder also sweated his own work, since he had already sold the house. He had built the house as close to the property line as he could - but he also used the wood stake instead of the real corner pin. The house he had built was about 3 inches inside the line, which was acceptable in the subdivision.
Find the corner pins before you start!
2. VISUALIZE your home on the land. This isn't easy, and the house will probably be larger on the property than you think it will be, when you are looking at a blank lot.
3. STAKE OUT the outer corners of the house, as you feel best for its location. Make sure the house will be clear of any setback restrictions along the property lines.
4. SELECT THE TREES to remove. Wrap and tie pink flagging tape around each tree that you want saved or removed. Be consistent in the way you mark the trees, and review your method with the grading contractor. It might be a good idea to ask him which way they normally see, so you can mark your trees the same way.
5. GET PRICES from grading contractors, about whom you have already gotten good recommendations. Don't be surprised if you get a price of $1500 from one and $3500 from another. Make sure that the scope (extent) of work is clear to every bidder.
6. BE ON THE SITE the entire site clearing time, if you are saving trees (and hopefully you can save some). Wear some good boots!
7. DON'T ADD to the contractor's work without discussing with him about any extra charges for doing more work.
Susan and I wish you the very best with the site clearing for the home of your dreams!
Sincerely,
Vic Hunt
Return to Home Site Preparation for Concrete page, from Home Site Clearing page


Vic and Susan Hunt are a husband and wife team with over 10 years experience designing and building homes.


Comments
Have your say about what you just read! Leave us a comment or question in the box below.