How to Check the Plumbing
in a Concrete Slab
How would you like to have the cold water plumbing line for the refrigerator ice maker stubbed up in your foyer? Hey - me neither! That's why, when I checked and measured the pipe layout in one of our houses before the concrete slab was poured and found the error, I called the plumber right away.
He was absolutely convinced that his crew had been accurate on everything - and this is a top notch company. The kitchen wall where the refrigerator was located backed up to the foyer at the front door of the house, and, sure enough, the pipe was a few inches outside the wall.
Hey, but what's 3 or 4 inches, unless it jumps over into the next room? The pipes that are installed under a concrete slab are one of the most critical parts of your home project, and you must check every pipe!
Even though the installer believes he did it all correctly, check it anyway! Everyone can make mistakes, and mistakes in the locations of these pipes under a concrete slab can be disastrous. We can't tell you enough how important this is for you to do.
This page covers checking the sewer and water pipes in a slab. See our pages, Checking Over the Concrete Slab, Drain Pipes, and Plumbing in the Walls, for other items to review and check.
Have your plumber ready to come right away after the fill is spread and compacted under the slab. He will dig trenches as needed to run the sewer pipes and water pipes, and should smooth the dirt or sand back when finished. You must decide or agree on the best location for the main sewer drain pipe to come out of the house before the plumber can start.
The air conditioner condensate water must drain into the house sewer if possible, so figure this out too with the plumber before he starts. We didn't know to do this on our first house, and there was no drain pipe near the air conditioning unit when it got installed in the attic. We had a tough time figuring out how to solve the problem.
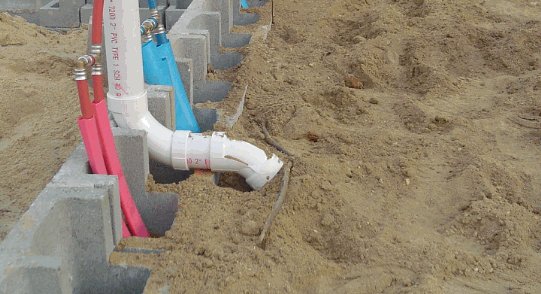
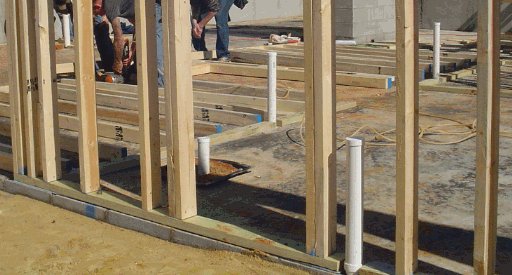
Take your floor plan and measuring tape, and check the location of every pipe. Using the dimensions on the floor plan, measure from the outside of the foundation walls or slab! The photo below shows a sink drain, hot water line, and cold water line at a stud wall on the outer edge of the floor slab. The pipes must be at the sink location shown on the floor plan.
You will probably be checking the layout after the workers have finished and gone for the day. If anything doesn't look right, mark it with your flagging tape and talk with the crew as soon as possible. Mistakes must be corrected before the concrete folks come back to prep and pour concrete!
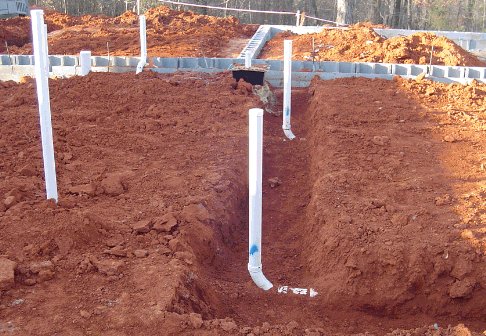
The drains and vent pipes on this house fall within load-bearing stud walls, except for the toilet and tub drains. The nearest pipe in the photo is a vent pipe, the pipe to the left is the washing machine drain, and the pipe beyond in the trench is a sink drain. The pipe in the black box is for the bath tub, and the largest pipe sticking up a few inches at the outer wall, to the left, is the toilet drain.
Notice the deeper trenches that form "grade beams," or thickened slab areas, beneath the stud walls.
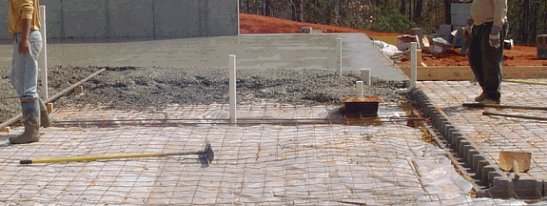
The photo below shows the same area during the pouring of the concrete, viewed from a different angle.
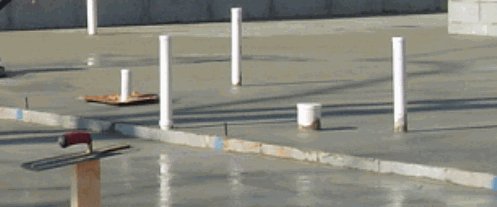
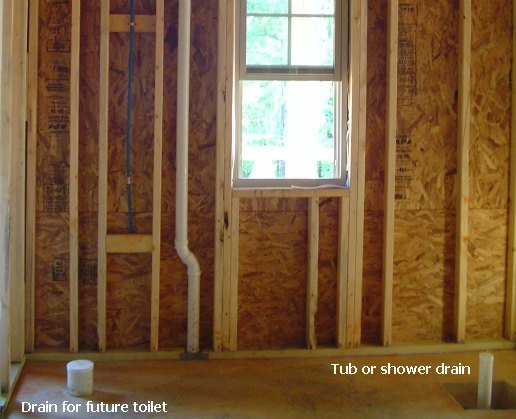
Views of the same drain and vent lines after the concrete slab was poured, and after the wood wall framing was installed (photos below).
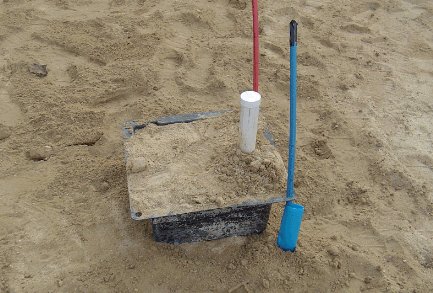
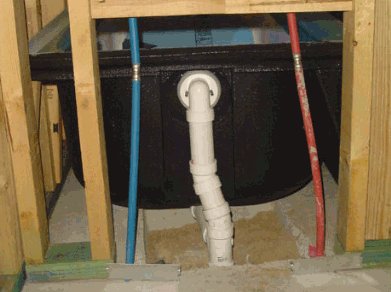
Plastic sand box that makes a blockout in the finished slab for the drain at a shower or bathtub. The blockout gives some space to adjust the drain piping, as shown in the picture below.
Check out the story of our friend Cheetah, who had a major pipe installed in the wrong place on his new house. I discovered it just in time.
Don't leave this one out! Make sure you have a drain pipe set up for the condensate drain of your air conditioning system! This usually doesn't show up on plans or fixture layouts. See our page on checking Plumbing in the Walls for pictures and more info on this essential drain.
Congratulations! You're on your way to insuring a perfect layout, by carefully checking the installation against the plans.
Susan and I wish you the very best with building the home of your dreams!
Sincerely,
Vic Hunt
Go to Plumbing in the Walls page.
Go to Home Site Preparation for Concrete page.


Vic and Susan Hunt are a husband and wife team with over 10 years experience designing and building homes.


Comments
Have your say about what you just read! Leave us a comment or question in the box below.