How to Check Fireplace Framing
for Pre-fab Fireboxes
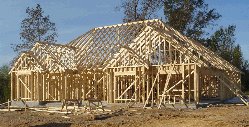
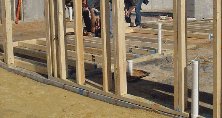
Fireplace framing must be planned before the wall framing begins if you want a fireplace with a pre-fabricated metal firebox.
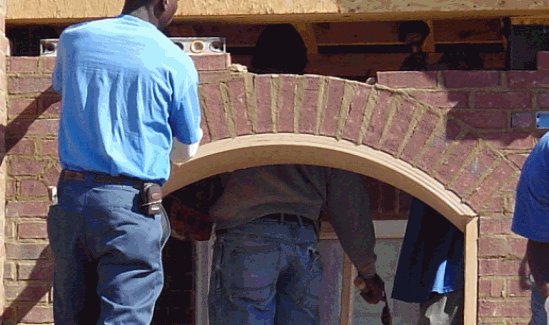
Firebox With Arched Stone Facing
Go to the "fireplace store" and select your firebox, or fireplace insert, before the framing starts.
Get the rough-in drawings with dimensions from the fireplace manufacturer's literature or brochure for the firebox you select. Make a copy of the drawings, and give them to your framer so he will have them when it's time for the fireplace framing. You should find two options in the details - one for a fireplace on or within a straight wall, and a second option for a corner fireplace.

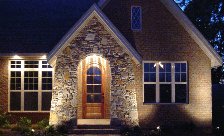
Authentic Stone Fireplace Front
Fireplace in a Straight Wall
In this plan detail drawing, the framed opening must be the exact width shown (41-1/4"). The metal firebox has a nailing flange on each side, and if the opening's stud framing is set too wide apart, the hole will be too wide and won't hold the nailing flanges. Make sure the framer builds this opening width exactly according to the manufacturer's specs.
The "17-1/2" FRAMING DIMENSION" shown as the depth is actually a minimum. More depth is okay.
This detail is from the plan of a house we built, where we wanted the fireplace and the wall above to be popped out a few inches from the main wall of the room. This is done with a variation on the detail we looked at above. The framing on the sides of the firebox must be carefully thought out so everything will look right when finished. This fireplace was clad in brick that we painted white, shown as the hatched material. A photo of the finished fireplace is shown at the bottom of this web page (white brick fireplace).

Corner Fireplace
The plan to the right is for the same firebox. Notice the fireplace framing dimensions are the same as those of the first detail. One of the trickiest elements of a corner fireplace is getting the front, angled wall long enough for the mantel you plan to use. The 68-7/8" width shown on this plan is well short of the mantels we typically use. Most of ours need at least 7 feet of face surface (total width of mantel plus some flat wall on each side). So remember that, in this detail, every dimension is a minimum that can be larger, except for the 41-1/4" firebox opening, which must be exact.

In the FRONT VIEW shown here, the fireplace framing must have an opening of at least the FRAMING DIMENSION height. A little more is okay, but not necessary. Any excess gap remaining after the firebox is installed can be filled in with lumber.

The corner firebox above is fastened to the wood studs with the nailing flanges on the sides. The vertical dimension is a close fit, but there is no nailing or attachment at the top or bottom. A common practice is to install the header framing across the top of the firebox after it has been nailed into place. Installation of the firebox is much easier, and the header can be set at just the right height without guesswork or surprises.
The front face of the firebox is made to stick out 1/2 inch from the nailing flanges, so that the outer face of the firebox will end up even with the outer face of the drywall later on, when the drywall is installed.
There was a time when placing heavy wood blocking in the stud framing above the fireplace was critical (for mounting a television bracket). Recently, as tv's have gotten thinner and lighter, their wall brackets have been simplified. They can now be screwed directly through the drywall into the normal wall studs, in whatever location they fall.

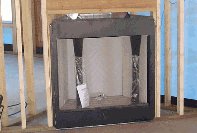
Tip: After the firebox is set and nailed in, use painter's tape to attach a sheet of plastic over the front. Construction sites are incredibly dusty from start to finish, and the plastic keeps the interior of the firebox virtually free of dust, drywall compound and paint. This also provides a spot to hide a set of drawings or other job items. See the picture below.

Firebox Opening With Dust Cover
As you can see in these photos, prefab fireplaces can also be finished with brick or tile.
About the Photos and Drawings on This Page
The three fireplaces shown are in houses we designed and built. The details came from the online installation manual of a Majestic VFH Series Vent Free Fireplace. We have had great success using these units on several houses.
We thank Monessen Hearth Systems for permission to use their details on this web page. Click on the links below for more information about their products, and for framing details:
http://www.monessenhearth.com/
Enjoy your fireplace! It will be great! We wish you the best.
Return from Fireplace Framing page to Framing page.


Vic and Susan Hunt are a husband and wife team with over 10 years experience designing and building homes.


Comments
Have your say about what you just read! Leave us a comment or question in the box below.